Mount Scope
One basic principle applies to all conventional ring-type scope mount systems and designs : The rings are the only place your scope actually touches your firearm. Ergo, in terms of the performance of the internal features and mechanisms of scope itself, scope-to-ring fit and alignment are the single most critical factors. This rule holds true for rifle, handgun or shotgun regardless of the firearm design or mount base system used. Given a solid base mount to begin with, most scope problems can be traced to the scope/ring interface. Here are a few technical tips to ensure your scope sight is perfectly fitted, aligned and tuned to the rings that hold it.
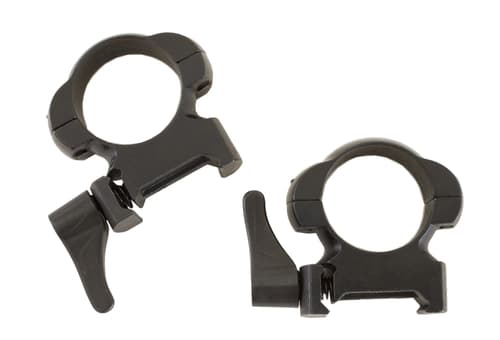
Discover Top Mount Rifle Scope in Amazon.com
Rule No. 1: Never, ever, use the scope itself as a fitting or alignment tool.
With few exceptions, scope sight tubes are made of thin aluminum, and even the few steel or titanium-tubed scopes on the market are not strong enough to be used to rotate or align rings. The flexibility of the scope tube, in fact, is one of the basic problems, since a shooter usually will not notice any slight ring misalignment when installing a scope because the tube will flex enough to be tightened down without apparent problem.
Such flex, however slight, puts strain on the scope tube and distorts its internal optical alignment, its lens and adjustment fittings and its zoom mechanisms (if any). The main reason good-quality scopes “fail” in normal use (reticles break or turn, lenses become loose, zoom mechanisms bind, adjustment intervals become irregular) is because the tube is stressed–slightly “bent”–by being held tightly by misaligned rings.
The only way to avoid this is to use a solid steel fitting bar, either one-inch or 30mm diameter as suitable. Go to a local machine shop and have one made in exact diameter, a foot long, from the hardest steel they have. I bought mine 10 years ago, and it’s about the smartest 15 I’ve ever spent. Some folks use wooden dowels (broomsticks, hammer handles) for this work, but wood also flexes, scars easily and can’t be used for another technique I’ll get to further along.
If you have a twist-in/dovetail-style front ring and side-screw rear-ring mount (the classic Redfield, Burris and Leupold styles), first tighten the front ring onto the fitting bar and rotate it into alignment with the rear ring position. Then slide the rear ring onto the bar, nudge it into the correct position relative to the base slots for the rear-ring windage screws, and make sure both forward and rear rings are tight on the rod.
Tighten the rear ring base screws into place, with the rear ring at apparent visual center (left-to-right) on the mount base. Now remove the top portion of the rings and check for a stress-free fit. If the fitting bar seems to “rise” out of the bottoms of the rings when the tops are loosened, doesn’t drop perfectly into a fully seated position when replaced or won t easily lift in and out of a fully seated position, you’ve left some stress in the system.
If so, use the bar to nudge the alignment of the front ring, or fiddle with the lateral angle of the rear ring by alternately loosening and tightening the right and left rear ring base screws until all apparent stress is eliminated (hammer-handles or wooden dowels don’t let you be exact in this).
Once the system is finally set, avoid removing the front rotating ring from the base because the ring/base fit will wear very quickly and become slightly loose. On twist-in ring systems, this is the key recoil stress point, and recoil will quickly make a small amount of slack become major. If you ever need to dismount a rotating ring more than two or three times, trash it and install a new one.
Follow these exact same procedures with a double-dovetail system, where both the front and rear rings “twist in.” It just usually takes a little more fiddling.
Nontwist Setups
For nontwist setups using Weaver-type crosscut rings, Sako-like tapered dovetail rails or Ruger-type integral ring/mount devices, your approach is to first position the ring bottoms just slightly loose on the mount base or firearm, then tighten the ring top securely around the bar. Then firmly snug the rings to the base. The bar won’t “give” like the scope tube would, so the rings will tighten to the base in correct alignment.
Once all stress is eliminated and the rings are perfectly aligned, you can improve the precision fit even more by coating the inner surface of the irng with lapping compound (available from hardware or automotive stores), placing the fiting bar into the rings and rotating the bar inside the rings to lap their inner surfaces while slowly increasing the tightness of the screws holding the ring top halves to their bottoms. This lapping removes high spots on the inner ring surfaces–increasing the bearing surface between rings and scope and enhancing ring/scope stability. Lapping will also reduce marring of the scope tube surface from machine marks on the inside of the rings but will not affect the slight radial “clamping grooves” on the rings’ inner surfaces. Lapping will improve the ring/scope interface on any type of mount system.
After lapping, clean the inner ring surfaces thoroughly with degreaser, and dust the lower ring surfaces with powdered rosin (available in the baseball section of sporting goods stores).
Lay the scope into the bottom rings and adjust for level reticle angle, proper eye-relief position and clearance of the scope above the gun. Slowly tighten the upper rings into place, alternating turns on the front and rear screws, left-side and right-side.
Some rings have a tendency to “pull” the scope slightly as they are tightened, causing the reticle to move off-square. Prevent this by making a lead pencil mark on the scope tube at the edge of one ring before tightening; if the scope starts to shift, correct it.
If you follow these procedures carefully, you’ll spend a few hours of time in the process. Your impulse when you get a new scope is to get it on your gun and get to shooting as quickly as possible. And yes, you can slap it on there pretty quickly–and pretty badly. Slow down just a tad. Do it right. You’ll ensure your scope sight has the best possible fit and alignment in its rings, and you’ll go a long way toward avoiding the most common type of scope failures.
You can watch video bellow to consult:


Speak Your Mind
You must be logged in to post a comment.