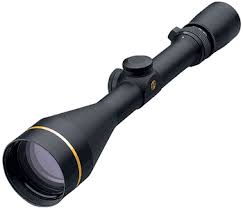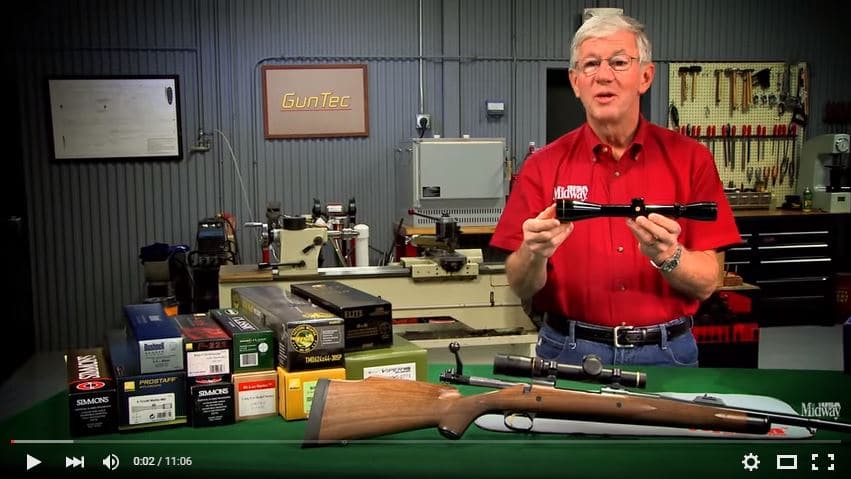
A scope should be the second most expensive part of your firearm purchase, after the rifle itself. In fact, many target shooters recommend you spend at least as much on your scope as you did on your rifle, if not more! As such, it is important that you know the basics about scopes before you make a decision on what scope best fits your rifle and intended philosophy of use (POU). This is why Midway USA goes over the basics parts of a scope and how it works in the first half of their video “Gunsmithing – How to Chooses A Rifle Scope Presented by Larry Potterfield of MidwayUSA.”
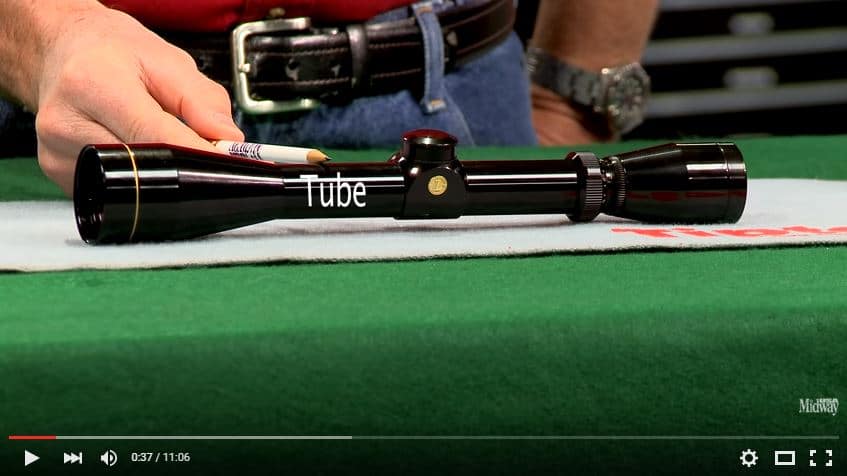
The main component of any scope is the TUBE which is where the turrets are mounted, and is the main body of the scope. The tube is usually come in a 1 inch or a 30mm size. (Note: when buying scope rings, be sure to get the right diameter for your scope tube; the two sizes of rings ARE NOT interchangeable.)
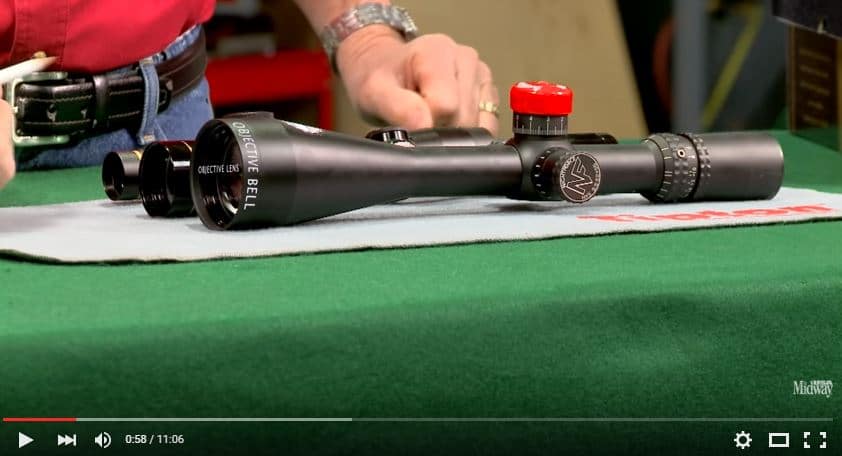
The OBJECTIVE BELL is the end of the scope that holds the OBJECTIVE LENS, and is the end that is farthest away from your eye. It is also the most important factor in determining how well a scope will function. The size of this is what the number after the “x” on the information for the scope’s zoom.
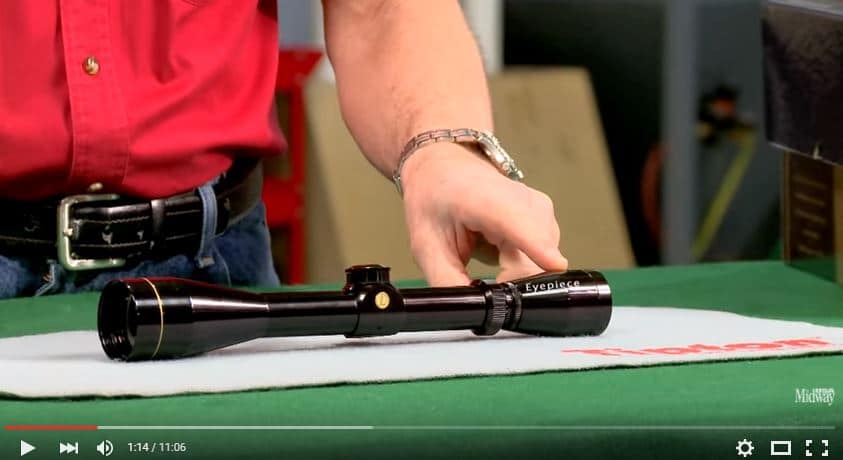
The EYEPIECE houses the lens that is closest to your eye, which is the OCULAR LENS.
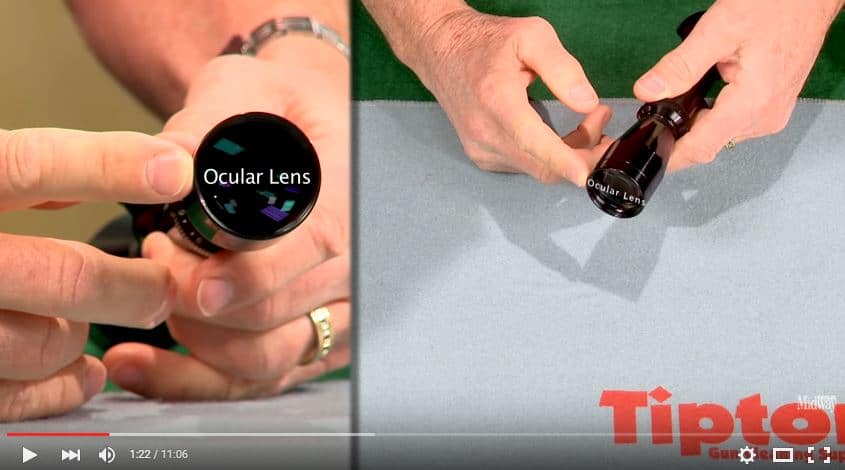
The OCULAR LENS is the lens that is closest to your eye, and the one you directly look through.
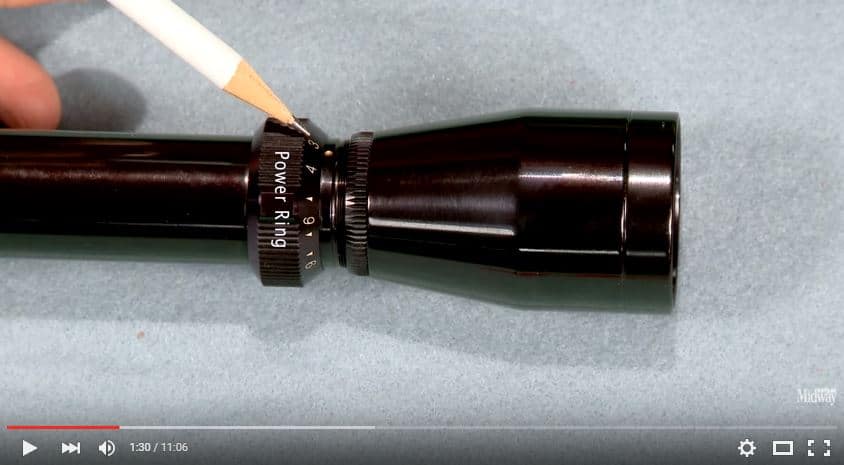
The POWER RING is only on variable powered scopes, and allows you to change how much magnification you are using, allowing you to make the target look either closer or farther away from you then it had before.
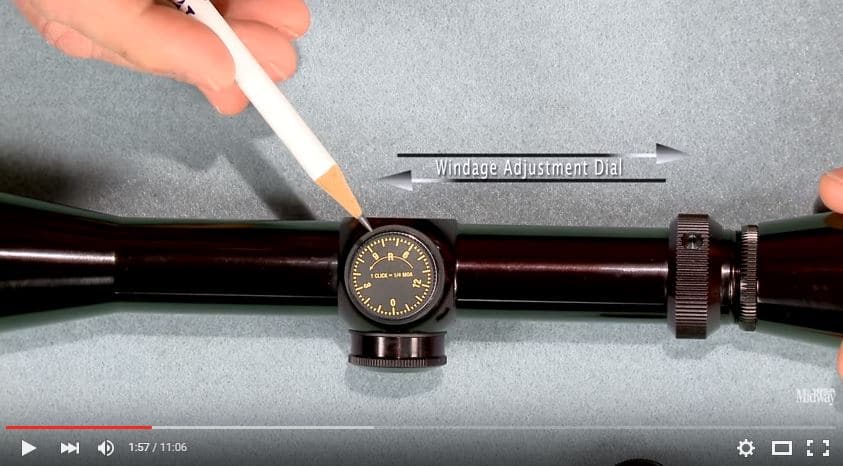
The WINDAGE ADJUSTMENT DIAL allows you to sight in your rifle for left/right errors in where you’re hitting. Different scopes have different adjustment amounts per click, but a common one is 1 click is 1/4 MOA. This means that at 100 yards, it will move the aiming point by 1/4 of an inch; at 50 yards, it moves it 1/8 of inch; at 200 yards, a 1/2 inch. Moving towards the right means where you’re hitting goes right, so you’d use it when you’re hitting to the left.
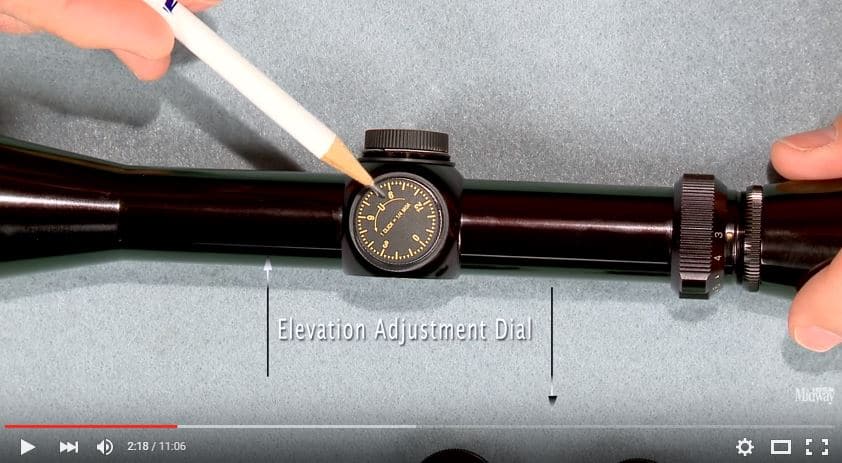
The ELEVATION ADJUSTMENT DIAL allows you to sight in your rifle for left/right errors in where you’re hitting. Different scopes have different adjustment amounts per click, but a common one is 1 click is 1/4 MOA. This means that at 100 yards, it will move the aiming point by 1/4 of an inch; at 50 yards, it moves it 1/8 of inch; at 200 yards, a 1/2 inch. Moving the dial up means where you’re hitting goes up, so you’d use it when you’re hitting too low.
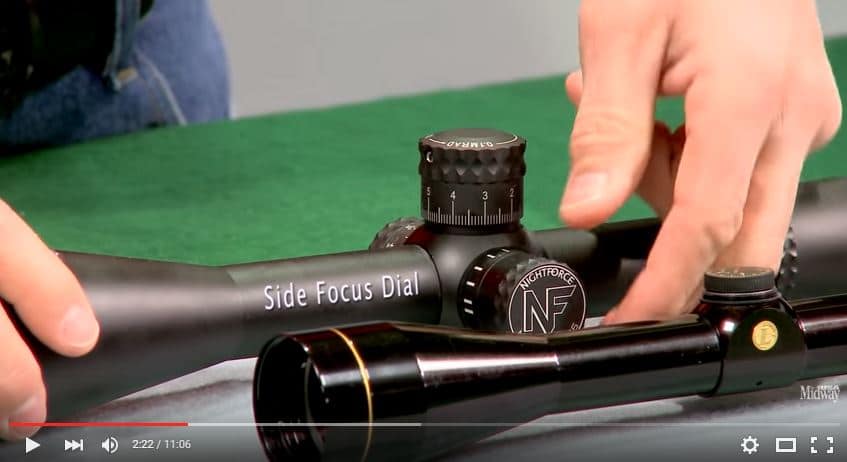
The SIDE FOCUS DIAL allows you to focus on your target, and make it come in clearer, though usually at the expense of making the rest of the sight picture blurrier. This feature is only on some scopes, usually higher end ones.

The ADJUSTABLE OBJECTIVE RING does the same thing as the SIDE FOCUS DIAL, and is also only found on a few scopes, again, usually higher end scopes.
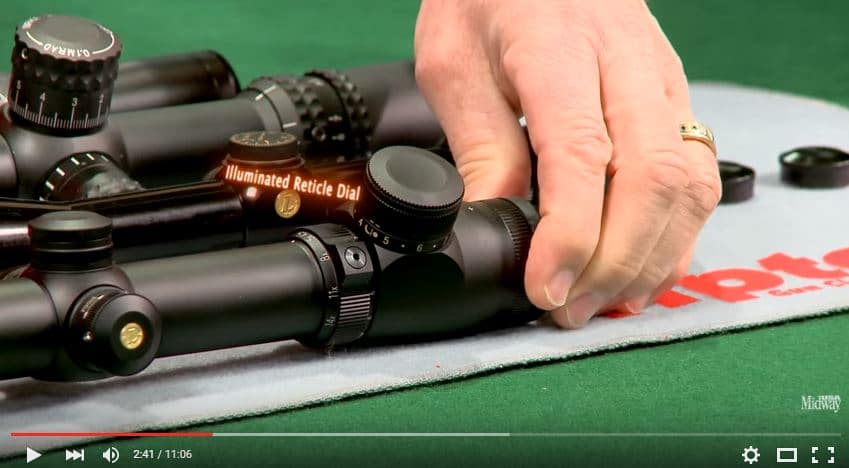
The ILLUMINATED RETICLE DIAL is also found only on some scopes. If you scope has this feature, it allows you to illuminate your reticle to make it easier to see in low light. This also allows you to adjust how bright your reticle is, so that you don’t lose your target in low light, because it’s too bright to see it.

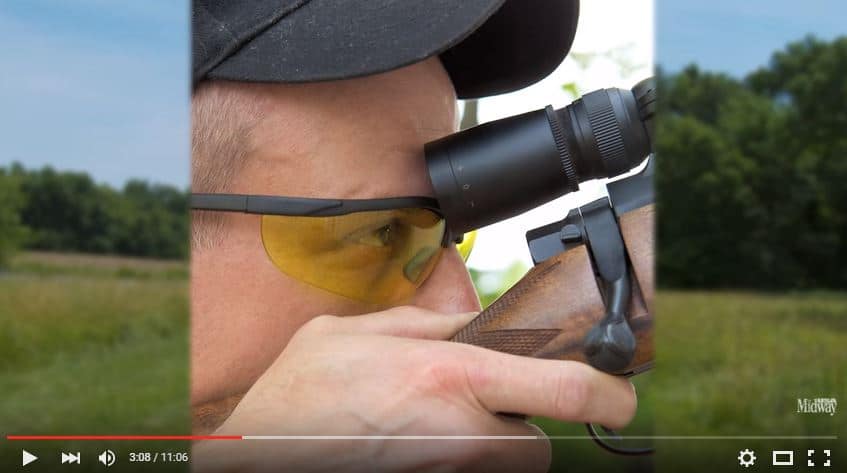
EYE RELIEF is how far away your eye is from your scope. Different scopes have different eye reliefs that they work for. For example, most pistol scopes have infinite eye relief, so that it can be any distance from your eye, and still show the maximum field of view. Rifle scopes usually have set eye reliefs that they are optimized for.
One danger of having too little EYE RELIEF is that the scope will hit you one or above your eyebrow, especially on heavier recoiling rifle. To fix this, find a scope that has a longer EYE RELIEF, allowing a bit more space for the scope to recoil without hitting your face.
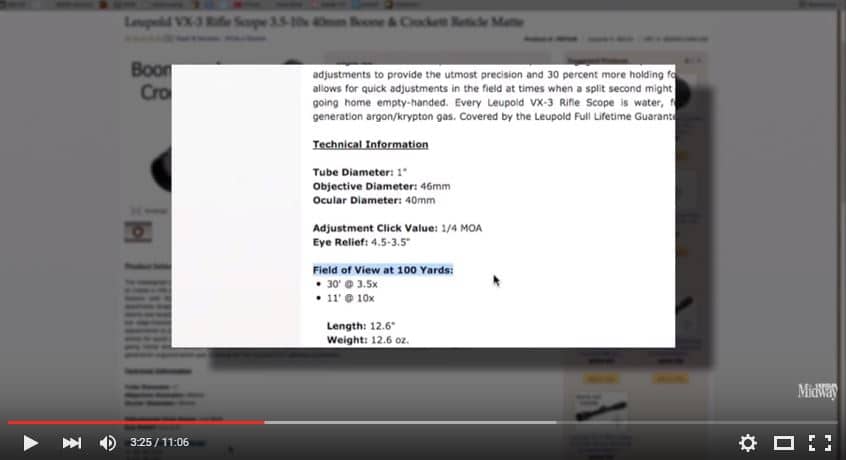
FIELD OF VIEW is how big of an area you are seeing at a particular range. It is how measured from one side to the other of the image you see. As you increase power on a scope, the field of view gets smaller. Different scopes can have different fields of views at the same power, and a larger FIELD OF VIEW is always a plus.

The larger the OBJECTIVE LENS, the larger the EXIT PUPIL is, the brighter the image will be, and the better your scope will perform in sub-optimal lighting conditions. For any given OBJECTIVE LENS, the higher the power is, the smaller the exit pupil is. So as you zoom in on a target, the EXIT PUPIL will decrease in size proportionally.
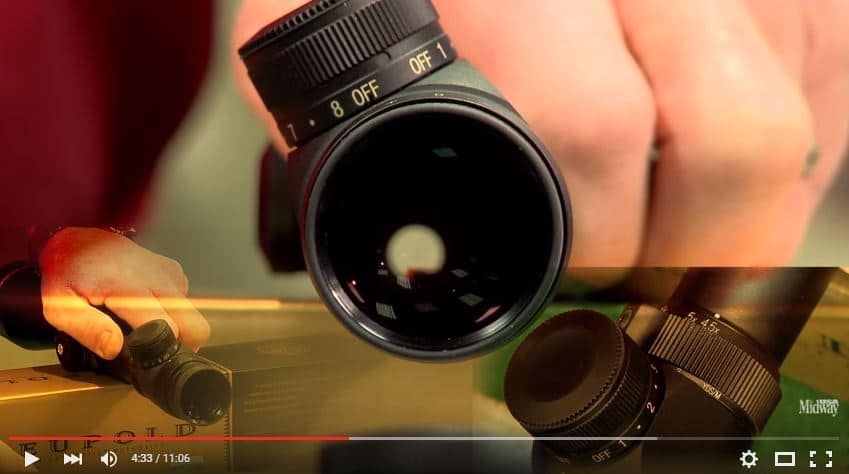
This scope is at it’s lowest magnification, showing the size of it’s EXIT PUPIL.
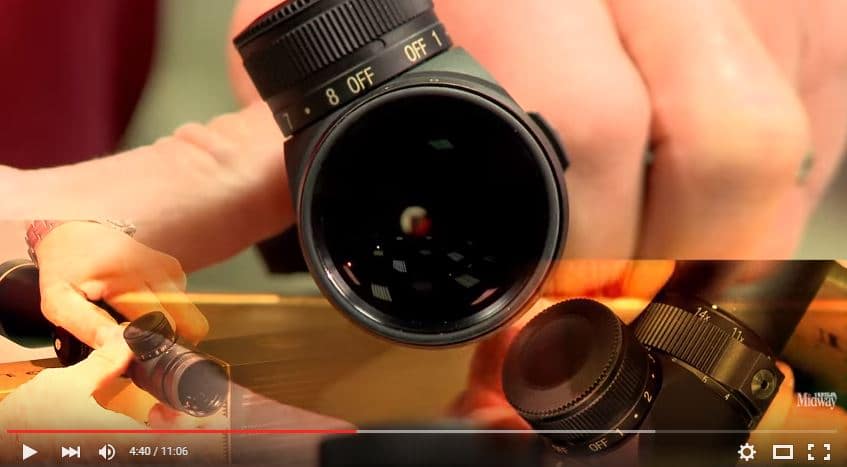
This is the same scope at it highest magnification, showing how the EXIT PUPIL shrinks as your magnification increases.
You can watch the whole video from start to finish here…