Important Aspects of Rifle Scope
If you think that rifle itself is enough for the shooting purpose then you are absolutely wrong. What is the main thing you consider when you go for buying a rifle? Just buy a rifle according to your work, and even buy it without thinking about the other things which are important to keep along with it. Do you need anything else to make your rifle experience better? The people who think that no they do not need anything else they are the people who suffer a lot in rifling. But if you think that yes you need to have something else then you are at right place. Yes you need to have a rifle scope for making your experience better than ever. For the better performance you have to only buy a rifle scope, because not having it may adversely affect your performance, you even had noticed when you were performing somewhere and could not hit the target because you could not get the target exactly. [Read more…]
Rifle Scope – Tips and Advantages
What do you do when you go out for buying a rifle? Buy a rifle spend much of the money and then go back home. Do you think that something else can be done to make the rifle using experience better? Go and use it? No actually not because a better thing can be done, for making a better use of it. That is get a rifle scope for it. Don’t you think it is important for you when you are going for a professional training or going to perform professionally? Yes it is very important do you want me to tell that how much it is important for you and how does it effects your performance? Yes this write up is specially to make you realize the important of using rifle scope.
Many people think that only buying a rifle is enough for them. But it is nothing like that you need to have a scope for it rifle itself is not having that ability to make the target hit at the right point so now I am going to tell you the main advantages of using the rifle scope so that you can have a positive mind for using a rifle scope and you may hit the target in such a good way that other people should praise you in a best of the manner. Continue Reading
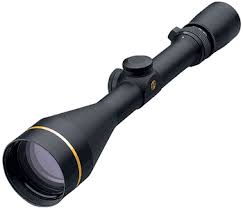
The Basics on Infrared Rifle Scopes

Infrared Rifle Scopes
Rifle scopes are the easiest sights to use. Equipped with scopes, shooting becomes Continue Reading
Mount Up: a Properly Installed Riflescope Is a Happy Riflescope
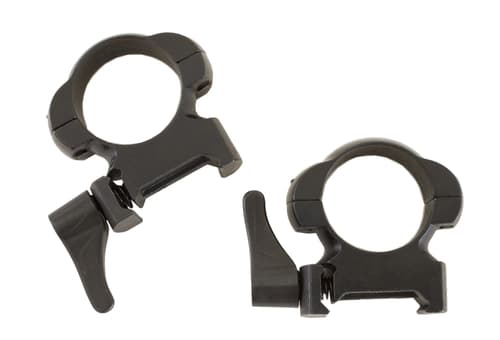
Mount Scope
One basic principle applies to all conventional ring-type scope mount systems and designs : The rings are the only place your scope actually touches your firearm. Ergo, in terms of the performance of the internal features and mechanisms of scope itself, scope-to-ring fit and alignment are the single most critical factors. This rule holds true for rifle, handgun or shotgun regardless of the firearm design or mount base system used. Given a solid base mount to begin with, most scope problems can be traced to the scope/ring interface. Here are a few technical tips to ensure your scope sight is perfectly fitted, aligned and tuned to the rings that hold it.
Discover Top Mount Rifle Scope in Amazon.com Continue Reading